Showing posts with label Exercise Instruction. Show all posts

Monday, May 16, 2011

Exercise of the week 5/16/11

Standing Leg Curl

This exercise works the hamstring muscle group which is located on the back of the upper leg.  This muscle group is a common area for injury in athletes - think pulled hamstring - so it is important for them to train it.  It is also important for the non-athletes out there to keep this musculature strong and flexible. This is a very tough body part to train without a specific machine and this, the standing leg curl, is the easiest exercise to learn and perform without a machine.


How to perform:
➱ Stand with your feet shoulder-width apart
➱ Place your hands on a stable object
➱ Place one foot firmly on the ground and shift your body weight to that side
➱ While keeping the unweighted leg straight, move it back so that its toes are slightly behind the weighted leg's heel


➱ While keeping your foot relaxed and your knees in line-
➱ Bend at your knee and lift the unweighted leg as high as you can
➱ Hold/squeeze the muscles at the end of the movement
➱ Relax your leg and let it return to the starting position
➱ Repeat for the prescribed number of reps


Make sure you keep your hips locked in place while you perform this movement.  That is, do not rock or move your lower back while performing this exercise.  Good luck!  Please feel free to contact me with any questions about this, or any other exercise, and I am always open to suggestions on which exercise to cover next.

-Jason

Monday, May 9, 2011

Exercise of the week 5/9/11

Seated Dumbbell(DB) Curl

This exercise primarily works the biceps muscle which is on the front of the upper arm.  Most people are familiar with this muscle, and many spend a significant portion of their upper body training time devoted to sculpting this muscle.  I wouldn't recommend sacrificing a lot of your limited time to training this muscle group, but I do think that it is important to give it some attention.   One of the biggest reasons I advocate spending time on training these muscles is because of the reciprocal benefits. For example, the forearm muscles have to contract and grip the DB's firmly when you perform this exercise.  By doing this they become stronger.  When they are stronger they are more able to help you out in your life's activities- such as opening a can, gripping a bag, carrying a baby or any other similar activity.

How to perform:

❑ Hold the 2 DB's at your side
❑ Let your arms relax and fully extend
❑ Relax your neck
❑ Lock your elbows in position at your side


❑ While maintaining your neck and elbow positions-
❑ Lift the DB's up to about shoulder height
❑ Hold/squeeze the muscles at the end of the movement
❑ Relax the muscles and slowly lower your arms to the starting position
❑ Repeat for the prescribed number of reps


This is a fantastic exercise to learn and add to your routine.  There are a great number of varieties and complexities that you can add to this movement to change it up and make it tougher.  I would recommend starting with this version and then challenging yourself with other versions as you gain strength.  Good luck!  Please feel free to contact me with any questions about this, or any other exercise, and I am always open to suggestions on which exercise to cover next week.

-Jason

Monday, May 2, 2011

Exercise of the week 5/2/11

Standing Calf Raise

This exercise primarily works the large calf muscle, the Gastrocnemius, in your lower leg.  This muscle is very important in helping your foot plant and extend stably when you walk, skip, jog, run and jump.  Athletes definitely need this muscle to be in top condition so they can safely perform their sports, but non-athletes also benefit greatly from the training of this muscle.  The benefits to the non-athletes comes from all of the surrounding tissue that gets strengthened when performing this exercise.  Theses areas include the Achilles tendon- which is actually part of the Gastrocnemius, the ankle connective tissue, the foot musculature and the foot connective tissue.  When all of these surrounding tissues are trained the ankle/foot apparatus is a much stronger and a more stable platform.

How to perform:

♢ Beginners- stand with your feet flat on the floor and shoulder width apart
♢ Advanced- stand on the lowest stair, or stable platform, with your feet shoulder width apart
♢ Without locking your knees, keep your legs in a fixed position for the entire range of motion

Beginners

Advanced


♢ While pivoting from ~ the balls of your feet, lift yourself up onto your toes
♢ Hold and squeeze the muscles at the end of the movement
♢ Beginners- Relax your calves and let your heals return to the floor
♢ Advanced- Relax your calves and let your heals sink to a comfortable level below the starting point
♢ Repeat for the prescribed number of reps

Beginners

Advanced


This is an overall fantastic exercise.  There are many ways to increase the difficulty of this movement and I encourage you to seek them out.  One thing I do not recommend though is to undertake this exercise ballistically.  Make sure the entire range of motion is done in a slow and controlled fashion.  This will ensure you get the most out of the exercise and also help prevent an injury.  Good luck!  Please feel free to contact with any questions about this, or any other exercise, and I am always open to suggestions on which exercise to cover next week.

-Jason

Monday, April 25, 2011

Exercise of the week 4/25/11

Dumbbell(DB) Lateral Raise

This exercise primarily works the deltoids, more commonly known as the shoulder, musculature.  There are three different deltoid muscles and each type of shoulder exercise works the three parts in a different ratio to the other parts.  Functionally, the shoulders are very important to us because they are involved in some way with any movement we make with our arms.  Aesthetically, they are important because they define the shape of the upper body.  If you have strong and defined deltoids you will be able to look good as you muscle your way throughout the day!


How to perform:


❍ While seated or standing hold two DB's at your sides
❍ Put a slight bend in your elbows
❍ Keep your neck relaxed


❍ Lift the DB's up to ~shoulder height
❍ Hold/Squeeze the muscles at the end of the movement
❍ Relax your shoulders and let your arms return to your sides
❍ Repeat for the prescribed number of reps


 Many people find that their neck gets tight while they are undertaking this exercise.  To help prevent this make sure that you keep your neck as relaxed as possible while you work through this movement.  Good luck!  Please feel free to contact me with any questions about this, or any other exercise, and I am always open to suggestions on which exercise to cover next week.

-Jason

Monday, April 18, 2011

Exercise of the week 4/18/11

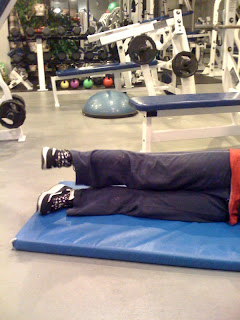
Inner Thigh Raise

This exercise works the muscle groups that are on the inside of your thigh.  Theses muscles are important for your balance while standing, and they are called upon heavily when making sharp cuts when running.  Athletes need these muscles to be strong to help prevent pulled groins and non-athletes need these muscles to be strong to help keep themselves stable and upright.

There are two basic versions that I will show to help get everyone started.  Generally speaking, I find that most women are more comfortable with their planted foot in front of their moving leg- Version #1/ pictures 1 & 3- and most men are more comfortable with their planted foot behind their moving leg- Version#2/ pictures 2 & 4.  Give them both a try.  If one works better for you than the other version then stick with that one, but if they both seem fine then alternate the two types.

How to perform:
- Lay on your side and straighten your lower leg out
- Bend the knee of your other leg and place your foot to match either Version #1 or Version #2
- Place your trunk and head in a comfortable relaxed position

Version #1

Version #2

- With your foot relaxed, lift your leg as high as you comfortably can
- Hold/squeeze the muscles at the end of the movement
- Relax the leg and let it return to the starting position
- Repeat for the prescribed number of reps
- Flip over to your other side and repeat


Version #1

Version #2


Good luck! Please feel free to contact me with any questions about this, or any other exercise, and I am always open to suggestions on which exercise to cover next week.


-Jason

Friday, April 15, 2011

Spring Fitness Routine

I was recently asked to spend a little time writing about what someone could do to prepare herself for wearing Spring and Summer clothing.

This is the exact statement-
"We need more exercises to get us ready for capri pants, shorts, short sleeve shirts, tank tops and the dreaded bathing suit..."

What I will assume from this request is that people are looking for a way to tone up areas of their bodies that have been hidden for awhile, but that are now going to be in view.  This is a pretty straightforward request, but actually it is not a quick-and-easy topic to cover.  It is a tough topic to cover because what is one person's perfect spot is another person's problem.  That is, someone may be very happy with how her legs look, but not happy with her shoulders.  And vice versa.  What I can specifically recommend are 3 things:

#1:  Cardio, cardio, cardio and more cardio!  If you are looking to tone things up quickly, nothing has quite as fast an impact as some quality cardio time.  The more  time you can put in, the better the toning results.

#2:  Target the area you have a problem with by adding an extra day of resistance training to your program that specifically addresses the area.  If you are unhappy with your shoulders, do an extra workout with 4-5 shoulder exercises.  If it is your legs that you don't love, put a day in the schedule where you train just with leg exercises.

#3:  Contact me for more advice.  I can more easily and specifically give advice if I am aware of what someone's problem areas are exactly.  If you click on the space under my picture that states, "View my complete profile", it will take you to a page that has a "Contact Me" link.  Feel free to click on it and send me a message with your questions.  It is a link to my private email address and I will keep all material exchanged and discussed private.

Good luck with your work and I am hoping that the weather cooperates!

-Jason

Monday, April 11, 2011

Exercise of the week 4/11/11

One-arm dumbbell row

This exercise primarily works the musculature of the upper back, but parts of the shoulder, arm/forearm, and even the trunk musculature, are called upon to help out.  The ratio of which muscle groups are favored over the others is a function of body placement, and as you become more comfortable with the movement, you can experiment with different arm and body positions to obtain different effects.  This is a great exercise to learn and implement because it can be performed just about anywhere, even while on vacation.  As mentioned, there are many ways to perform this exercise, and I'll focus on 2 of the most basic to help get you started.

How to perform:

Kneeling
● Place one knee, and the same-side hand, on a bench
● Pick up the Dumbbell(DB) that you will be using
● Keep a slight bend in all of your stationary joints
● Place your neck in a relaxed and comfortable position


While keeping your core tight and trunk fixed in place:
● Lift the DB as far up as you comfortably can
● Hold/squeeze the muscle at the end of the movement
● Relax your arm and let it return to the starting position
● Repeat for the prescribed number of reps


Free Standing
● Place one hand on a solid fixed object
● Place the same-side foot in front of your other
● Keep a slight bend in all of your stationary joints
● Place your neck in a relaxed and comfortable position
● Pick up the Dumbbell(DB) that you will be using
● While keeping your core tight lean slightly forward


While keeping your core tight and trunk fixed in place:
● Lift the DB as far up as you comfortably can
● Hold/squeeze the muscle at the end of the movement
● Relax your arm and let it return to the starting position
● Repeat for the prescribed number of reps


I encourage you to alternate the way in which you perform this exercise.  Sometimes perform it kneeling, and other times complete it free standing.  Good luck!  Please feel free to contact me with any questions about this, or any other exercise, and I am always open to suggestions on which exercise to cover next week.

-Jason

Monday, April 4, 2011

Exercise of the week 4/4/11

Outer Thigh Raise


This exercise works the muscles on the side of your hip. These muscles are important in helping you plant yourself firmly into the ground and in maintaing your stability. Skaters and skiers are generally strong in these muscles, but they are important for everyone to train and improve. There are many different ways to undertake this exercise, and I will show 2 of the most basic and popular to get you started.


How to perform:


Standing
- Stand with feet shoulder-width apart
- Place your hands on a stable object
- Plant one foot firmly on the ground and shift your body weight to that side
- This should leave your unweighted leg dangling slightly above the ground

- With your foot relaxed, lift the unweighted leg as high as you comfortably can
Hold/squeeze the muscle at the end of the movement
- Relax the leg and let it return to the starting position
- Repeat for the prescribed number of reps
Laying on your side
- Lay on your side on a comfortable surface
- Extend both legs so that there is little to minimal bend in your knees
- Lift the top leg as high as you comfortably can
- Hold/Squeeze the muscle at the end of the movement
- Relax the leg and let it return to the starting position
- Repeat for the prescribed number of reps


I would encourage you to alternate the way in which you perform this exercise. Sometimes undertake it standing, and other times complete it while you are on your side. These two, and the many other varieties of this exercise, all have something a little different to add to your fitness.

Good luck! Please feel free to contact me with any questions about this, or any other exercise, and I am always open to suggestions on which exercise to cover next week.


-Jason

Monday, March 28, 2011

Exercise of the week 3/28/11

Bench Dip

This exercise focuses on the tricep musculature as well as utilizing some of the shoulder musculature.  It is a wonderful exercise that helps develop or maintain the strength that allows people to push themselves up out of chairs, or up from any seated position.

How to perform:

• Sit on a bench or another stable surface with your back straight and knees bent
• Place your hands at your sides and straighten your arms, but do not lock your elbows


• With tension in your arms, move your body so that you are off of the bench


• Lower yourself in a smooth controlled fashion
• Keep your back straight as you descend
• Go as low as you comfortably can


• Lift yourself back up until your arms are straight, but not locked


Many people will find this exercise very difficult at first.  I would recommend that you begin with a small range of motion - 2 to 4 inches - and work your way to a full range.  Experiment with different hand positions.  Many people find that if they place their hands perpendicular to their thighs (wrists turned out from your body), they are more comfortable than if they place them parallel (wrists bent as shown above).  Also, for safety's sake, I would recommend putting a cushion under you just in case you end up on the floor!

Good luck!  Please feel free to contact me with any questions about this, or any other exercise, and I am always open to suggestions on which exercise to cover next week.

-Jason

Monday, March 21, 2011

Exercise of the week 3/21/11

Standing Hip Extension

This exercise primarily works on the gluteal muscles.  The benefit of performing this exercise standing is that while you are moving and working one side of the musculature, the other side is also "working".  The non-moving side is involved because it has to stay active and contracted to help hold you in place.  Many people will notice that during the 2nd and 3rd sets of this exercise the stationary leg is burning more than the moving leg.  There are many ways to increase the difficulty of this exercise, but I would recommend that you master the basic version before you progress to tougher versions.


How to perform:


✦ Stand with feet shoulder-width apart with a slight forward lean
✦ Place your hands on a stable object
✦ Plant one foot firmly on the ground and shift your body weight to that side
    ◆ This should leave your unweighted leg dangling slightly above the ground


✦ Lead with the heel and move the non-planted foot back away from your body
✦ Keep your moving foot relaxed while performing the exercise
✦ You may get a better muscular contraction if you twist your foot slightly out during the exercise
✦ Move your leg as far back as it can comfortably travel
✦ Hold/squeeze the muscle at the end of the movement
✦ Relax the leg and let it return to the starting position
✦ Repeat for the prescribed number of reps


Experiment with the angle at which you move your leg.  Some people feel that they get the best contraction if they move straight back, and others find that they like to be slightly angled during their movement pattern.  What is a perfect direction for some might not be perfect for you.  When you feel you need more of a challenge, try adding some ankle weights to the lifts.  Refer to the Exercise of the Week 3/7/11 for my recommendation on ankle weights.

Please feel free to contact me with any questions about this exercise, or any other, and I am always open to suggestions on which exercise to cover next week.

-Jason

Monday, March 14, 2011

Exercise of the Week 3/14/11

The Push-Up

Of all the upper body exercises that can be performed, the push-up is one of the most beneficial.  It is a great exercise because it works several of the major upper body muscle groups - the chest, shoulder and tricep muscles - as well as the core musculature.  What also makes this a fantastic exercise is that it can be performed almost anywhere and by almost anyone.

There are a variety of different starting positions that can be used when performing a proper push-up.  It is important that if you are unsure of you abilities you start with the easiest position - the doorway or wall push-up - and work through the exercises toward the most difficult one - the full push-up.  While there are distinct differences in the appearance of all of the push-ups below, they all are exactly the same in the guidelines that need to be followed when performing the exercise.


How to perform:

✦ Place your hands at a comfortable width apart
✦ Keep your neck relaxed and your head in line with your spine
✦ While inhaling, begin lowering yourself
✦ Maintain a slow and controlled pace throughout the descent
✦ Keep your body rigid from the beginning to the end of the movement - do not bow your back
✦ Lower yourself to a comfortable ending position
✦ While exhaling, push-up to return to the starting point

Doorway or wall push-up


Counter top push-up


Kneeling push-up


Full push-up


This is by no means a complete list of the variety of push-ups that can be performed.  To increase the difficulty, or to just add variety, you can add training devices such as stability balls or push-up bars to your program.

Please feel free to contact me with any questions about this exercise, or any other, and I am always open to suggestions on which exercise to cover next week.

-Jason

Monday, March 7, 2011

Exercise of the Week 3/7/11

Straight Leg Raise

This is a very basic, but fantastic exercise that is used to strengthen the quadriceps and hip flexor muscles.  This is an exercise that is often used in physical therapy during the initial stages of knee rehabilitation, but I find it is an important exercise that should be incorporated into everyone's training program.  In addition to strengthening the specified muscles, this exercise also acts as a great warm-up for the legs and has the added benefit of possibly increasing the flexibility of the hamstrings.

How to perform:


■ Lay flat back on a comfortable surface
■ Bend the knee of the leg you are not going to lift.  This helps protect the back and makes the exercise more comfortable.
■ Relax the foot of the leg you are lifting
■ Begin lifting your straight leg


■ Move the leg at a slow controlled pace
■ Keep your hips flat and avoid arching your back


■ Continue lifting the leg upward until you feel a tightness in your hamstrings - the muscles in the back of the leg - or until you get to 90 degrees.
■ Slowly lower your leg back to the starting position
■ Repeat for your specified number of repetitions


■ Avoid bouncing your foot off of the ground between repetitions
■ Make sure you breathe while performing this or any exercise


When the exercise becomes too easy, you can increase the difficulty of it by adding ankle weights to your legs.  I recommend starting out with 1.0 lb per leg and increasing the weight by an additional 0.5 lbs whenever necessary.  There are many varieties of ankle weights available, but I have found that All-Pro makes the best set by far.  No one is even close in terms of ease of adjustment and durability.  They are very hard to find in stores, but this is what they look like:


And this is where you can buy them:

http://www.performbetter.com/detail.aspx_Q_ID_E_3918


Please feel free to contact me with any questions about this exercise, or any other, and I am always open to suggestions on which exercise to cover next week.

-Jason